Mini 4 Pro by DJI: The Drone Revolution Continues!

Mini 4 Pro by DJI: The Drone Revolution Continues! Remember the Mini 3 Pro? DJI left us all gobsmacked with that one by packing a treasure trove of tech into a feather-light drone. Well, folks, fasten your seatbelts because the DJI Mini 4 Pro has burst onto the scene with an impressive list of upgrades. Sure, the camera might seem like déjà vu, but wait till you hear about those nifty omnidirectional obstacle sensors. They’re like the drone’s guardian angels, making sure it never hits a blind spot. And, if that’s not enough, we’ve got the cherry on top – ActiveTrack 360, allowing you to orchestrate epic camera moves while tracking your subject. Say goodbye to shaky shots! A Stylish Upgrade Now, let’s talk looks. The Mini 4 Pro is still a featherweight champion at under 250 grams, which means you can soar through the skies without the hassle of licenses or registrations in many regions. But here’s the scoop – it’s undergone a makeover. The forward- and rear-facing sensors have shifted positions to keep an eye on the sides, and the design has been given a modern twist. There are snazzier cooling vents, sleeker rear arms, and new landing feet at the front. Even the camera/gimbal shield got a makeover for your convenience. Plus, there’s a new propeller guard in town to protect those precious blades when you’re not in the air. And the camera? It’s still your trusty partner in crime, tilting up 60 degrees and down 90, and flipping 90 degrees to grant you full vertical resolution for your social media glory. Don’t fret about storage; this baby comes with 2GB of internal space and a microSD port for those “just in case” moments. But wait, there’s more! DJI has thrown in a $55 ND filter set for those sunny days, and an 18mm equivalent lens attachment for just $40. Beware, though, it might give your shots a quirky, fish-eye twist. There’s also the magic of DJI’s Lightcut, an editing app that sprinkles stardust on your videos for social media. No more downloading footage to your smartphone; it’s all done wirelessly. Performance That’ll Leave You Breathless Let’s talk performance. This little dynamo, armed with the same sensor as DJI’s Action 4, is your flying action camera. It’s lightweight, nimble, and doesn’t break the bank, unlike its high-end cousins. Zooming along at a nifty 35 MPH in sport mode, or a comfortable 26 MPH in regular operation, it can handle winds up to 24 MPH. It might look like it’s dancing in the wind, but your footage will stay rock-steady, thanks to DJI‘s gimbal and stabilization wizardry. Remember the Mini 3 Pro‘s blind spots? Say goodbye to those with the Mini 4 Pro’s omnidirectional sensors, inspired by the Mavic 3 Pro and Air 3. It’s like giving your drone an extra pair of eyes, and it’s backed by DJI’s APAS, offering automatic braking and obstacle dodging. Safety first, right? I took this baby for a spin among trees and potential snags, and yes, there were a few bumps and scrapes (oops!). Here’s what I learned: these sensors are sunshine-loving, so dim light is a no-go. Thick forest with fine branches? Nope, they can be tricky. And, oh, the drone is at its best when flying forward, a bit less so sideways, and not so great when flying in reverse. Lesson learned: obstacles can be a handful. But fear not, ActiveTrack 360 comes to the rescue! It adds cinematic flair to your subject tracking. It’s a tad confusing at first, but once you get the hang of it, it’s like painting a masterpiece. Draw a route on concentric circles, and watch your drone follow it, gracefully dodging obstacles. The only hiccup? Figuring out which way is forward can be a puzzle. Practice in an open space before taking it to the big leagues! And if you’re not in the mood for artistic flourishes, don’t worry! The Mini 4 Pro still has DJI’s automatic modes for social media savants – MasterShots, QuickShots, Panorama, and Hyperlapse. Plus, it’s got the Waypoint feature from the Mavic 3 Pro, allowing you to pre-program intricate drone maneuvers and play them on repeat. Fancy, right? Better Connectivity Than Ever Speaking of connectivity, the Mini 4 Pro boasts Ocusync 4 transmission, a technology we first fell in love with in the Air 3. It sends 1080/60p video up to 20 km (12 miles for our friends across the pond), even if your drone decides to play hide-and-seek behind obstacles. Trust me, this upgrade is a game-changer. No more video hiccups! Power That Keeps Going Now, for the power nerds out there – the standard 2,590 mAh Intelligent Flight Battery is a tad beefier than the Mini 3 Pro’s 2,453 mAh cell. But here’s the kicker: flight time remains a solid 34 minutes. In the real world, we squeezed out about 25 minutes of fun before the return-to-home warning chimed in. So, plan your adventures accordingly. And here’s a little secret – if you already own the Mini 3 Pro, your batteries are buddies with the Mini 4 Pro. It’s like a reunion of old pals. Unfortunately, our friends in Europe can’t enjoy the Plus batteries, which offer up to 45 minutes of flight, due to local rules. Sorry, Europe! Controllers That Up the Ante Let’s not forget the controllers! DJI gives you two options: the basic RC-N2, which requires your smartphone, and the RC2 with a built-in screen. These are equipped with DJI’s new Ocusync 4 transmission, so they’re a match made in heaven with the Mini 4 Pro. Camera Magic Last but not least, the camera. The Mini 4 Pro sports the same 1/1.3 dual ISO sensor as its predecessor, with a trusty 24mm equivalent lens and a fixed f/1.7 aperture. That’s a pretty hefty sensor for a drone of this size, just a smidge smaller than the Mavic Air 2S’s 1-inch sensor. But what sets it apart?
DJI Air 3: A Marketing Move, Not an Innovative Drone
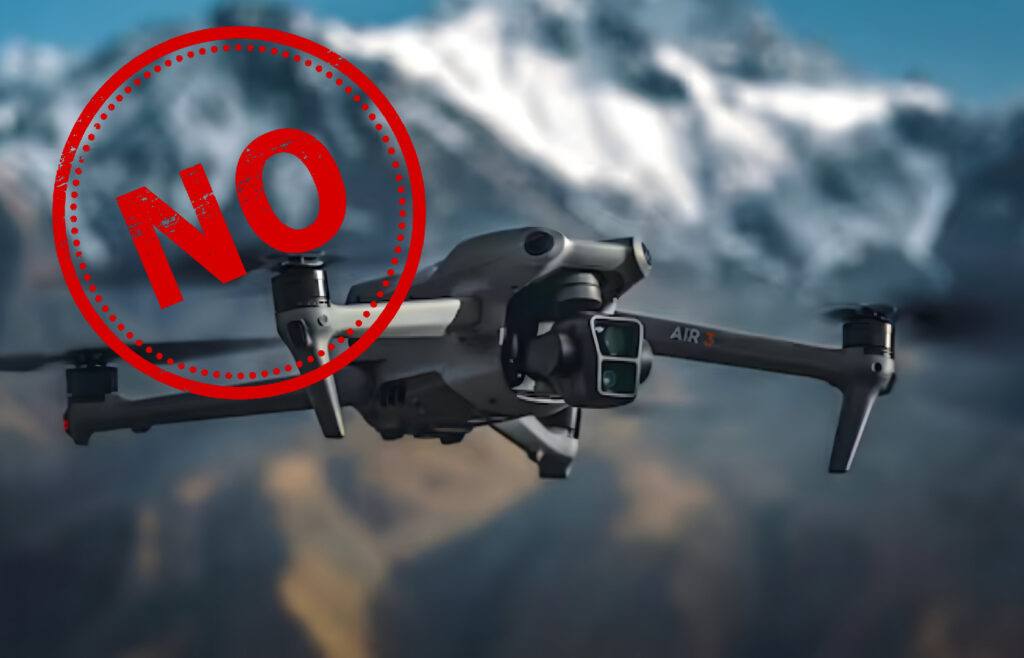
DJI Air 3: A Marketing Move, Not an Innovative Drone DJI has finally unveiled its latest drone, the Air 3, after much speculation and anticipation. As a supposed successor to the Air 2S, the Air 3 promises several upgrades and new features. However, upon closer examination, it becomes evident that this release is more of a marketing move rather than a truly innovative product. In this article, I will dissect DJI Air 3‘s features and discuss how DJI seems to be rehashing existing ideas without bringing any groundbreaking innovations to the table. But first, let’s watch the trailer launch: Underwhelming Camera Upgrades One of the most hyped aspects of the Air 3 is its two-camera system, offering a main lens with a larger f/1.7 aperture and a 70mm telephoto lens with a smaller f/2.8 aperture. While this configuration does provide some versatility in shooting, it lacks the wow factor that one would expect from a new flagship drone. The image quality is still commendable, but the fact that DJI has chosen to reuse the same telephoto lens found in the recent Mavic 3 Pro raises concerns. By recycling components from other models, the Air 3 fails to impress with a lack of innovation in its camera system. As a result, the drone ends up feeling like a compilation of previously seen features rather than a groundbreaking new release. Flawed Telephoto Camera and Filming Experience While the lens offers some new creative possibilities, it also has its downsides. The footage from the camera can look flat, lacking the stunning bokeh and separation between foreground and background that one would expect from a dedicated telephoto lens. Additionally, switching from the main lens to the telephoto lens may force users to increase the ISO, leading to more noise in the footage. This minor flaw takes away from the overall filming experience, and one cannot help but wonder why DJI did not incorporate after-market ND filters to address this issue. Even better, the inclusion of built-in ND filters or a variable aperture system could have made the drone more appealing and user-friendly. Lack of Exciting New Features Beyond the camera upgrades, there is a lack of excitement surrounding the Air 3’s other features. The improved connectivity with Ocusync 4 and the new controller does little to set it apart from previous models. DJI’s OcuSync system has already proven its reliability, and connection issues are a thing of the past. Battery life remains relatively unchanged, hovering around 45 minutes, which is standard for most of DJI’s drones. Although the drone world expected a breakthrough in battery technology, the Air 3 merely follows suit with its predecessors, leaving consumers underwhelmed. Disappointing Color Profile and Missing 48MP Mode Another drawback is the replacement of the D-Log color profile with D-Log M, a less flat variant. While D-Log M may be easier to color grade, it comes at the cost of noticeably reduced dynamic range. This change leaves drone enthusiasts disappointed as they lose the option to choose between the two color profiles that cater to different shooting preferences. Furthermore, DJI’s claim of a 48MP photo mode remains elusive, with users unable to locate this feature in the drone’s menu. The absence of this mode leaves a sense of incompleteness and indicates that the Air 3 may not have been thoroughly optimized before its release. Most popular: How to beat the Winter Blues to get motivated again The Power of ChatGPT for Streamlining Business Processes How to create a professional-looking video on a budget Come sconfiggere il fenomeno “Winter Blues” e recuperare la motivazione Crea un video professionale con un budget limitato Il Potere di ChatGPT per Ottimizzare i Processi Aziendali Most Recent: What is a Business Plan and How to Create One Il miglior microfono per i Content Creator: Hollyland Lark M1 Rivoluziona i tuoi video con Rask AI: lo strumento di traduzione e doppiaggio basato sull’IA. Revolutionize Your Video with Rask AI: The AI Translation and Dubbing Tool The Evolution of E-commerce: Unveiling the Four Distinct Models The Best Microphone for Content Creators: Hollyland Lark M1 Review Pros and Cons of the DJI Air 3 Drone: Pros: Capable Camera System: The Air 3 features a two-camera setup with a larger f/1.7 aperture main lens and a 70mm telephoto lens, offering versatility and good image quality in low-light conditions. Improved Connectivity: Ocusync 4 ensures a stable and reliable connection between the drone and the controller, providing seamless control during flights. 4K 60fps Filming: The drone allows smooth 4K video recording at 60 frames per second without cropping, delivering high-quality footage for filmmakers and content creators. Decent Battery Life: With approximately 46 minutes of flight time, the Air 3’s battery life is suitable for most aerial photography and videography sessions. Audible Noise Reduction: Larger propellers result in a lower-frequency, less piercing sound, enhancing the overall flying experience. Cons: Lack of Innovation: The Air 3 disappoints with a lack of groundbreaking features, relying on reusing components and ideas from previous models. Flat Telephoto Camera Footage: The 70mm telephoto lens produces footage with limited foreground-background separation, affecting the bokeh effect. Switching lenses may require ISO adjustments, potentially introducing noise. Disappointing Color Profile: Replacing the D-Log color profile with D-Log M reduces the dynamic range, making post-processing less flexible for some users. Missing 48MP Photo Mode: Users report being unable to find the advertised 48MP photo mode in the drone’s menu, raising concerns about feature completeness. Iterative Design: The Air 3’s design closely resembles other recent DJI models, lacking a distinct identity and fresh design elements. Conclusion: A Capable yet Uninspiring Drone In conclusion, the DJI Air 3 is undeniably a capable drone that performs well in many areas. However, its lack of true innovation and reliance on rehashed ideas make it a rather uninspiring release. The drone market expected something groundbreaking, yet the Air 3 fails to deliver on that front. For the price tag of $1,099 or $1,349 for the Fly More
Revolutionize Your Video with Rask AI: The AI Translation and Dubbing Tool

Revolutionize Your Video with Rask AI: The AI Translation and Dubbing Tool Businesses are constantly seeking efficient and cost-effective solutions to expand their reach across language barriers. I want to present to you a new artificial intelligence tool called Rask AI. It is an advanced AI-powered tool developed by Resemble AI that is set to redefine the landscape of video translation and dubbing (also in the world of content creation!). With its user-friendly interface and unmatched quality, Rask AI offers a streamlined localization process that rivals human translators, saving you valuable time and resources. Let’s explore the remarkable features and benefits of Rask AI, and discover how it can revolutionize your video localization efforts. Simplify Localization with Advanced AI Technology With Rask AI, the complex process of video translation and dubbing is simplified through cutting-edge AI technology. The user-friendly interface allows even those without technical expertise to seamlessly navigate the platform. Gone are the days of cumbersome localization tasks. Rask AI empowers businesses by offering an intuitive solution that simplifies the workflow and boosts productivity. Unleash Unprecedented Time Savings with Rask AI Time is a precious resource for any business, and Rask AI understands that. By leveraging its advanced AI capabilities, Rask AI significantly reduces the time required for translation and dubbing tasks. The automated nature of the tool enables swift processing, giving you the freedom to focus on other critical aspects of your projects. Experience unmatched efficiency as Rask AI accelerates your video production timelines. Human-Quality Localization at Your Fingertips One common concern with AI-powered translation tools is the compromise on quality. However, Rask AI shatters this misconception by offering translations and dubbing on par with human translators. The AI algorithms employed by Rask AI are trained to understand linguistic nuances and cultural context, ensuring that the final output is of exceptional quality. With Rask AI, you can confidently deliver localized videos that resonate with your target audience. Cost-Effective Solution for Every Business Budget constraints should never hinder your video localization efforts. Rask AI presents a cost-effective solution that caters to businesses of all sizes. By eliminating the need for extensive human resources and reducing time investments, Rask AI helps you maximize your ROI. Say goodbye to exorbitant localization costs and welcome an affordable alternative that doesn’t compromise on quality. Versatility for Diverse Industries and Content Types Rask AI’s versatility knows no bounds. Regardless of your industry or the type of content you produce, Rask AI seamlessly adapts to your needs. Whether it’s e-learning modules, marketing videos, or corporate presentations, Rask AI ensures accurate translations and synchronized dubbing that perfectly align with your specific requirements. Empower your brand with localized videos that resonate with your target audience. Most popular: How to beat the Winter Blues to get motivated again Come sconfiggere il fenomeno “Winter Blues” e recuperare la motivazione The Power of ChatGPT for Streamlining Business Processes Crea un video professionale con un budget limitato How to create a professional-looking video on a budget Il Potere di ChatGPT per Ottimizzare i Processi Aziendali Most Recent: Revolutionize Your Video with Rask AI: The AI Translation and Dubbing Tool The Evolution of E-commerce: Unveiling the Four Distinct Models The Best Microphone for Content Creators: Hollyland Lark M1 Review Principi di Ray Dalio: Scopri i Segreti del Successo Dall’Engagement alle Conversioni: Padroneggia il Digital Marketing per il successo aziendale Il momento di cambiare: Riconoscere i segnali di un lavoro che non fa più per te Enhance Your Videos with Resemble AI Integration To further enhance the capabilities of Rask AI, the integration of Resemble AI’s generative AI voices opens a realm of possibilities. Imagine creating custom voices for your dubbed videos, injecting a personalized touch that captivates your viewers. Resemble AI’s technology can also be utilized to generate synthetic training data for Rask AI, boosting the accuracy and effectiveness of the dubbed videos. The powerful synergy between Rask AI and Resemble AI empowers businesses to elevate their custom voice dubbing capabilities to new heights. Try Rask AI by Yourself Rask AI is a game-changer in the realm of video translation and dubbing. Its advanced AI technology simplifies localization, saves valuable time, and ensures human-quality translations. With its cost-effectiveness and versatility, Rask AI caters to businesses of all sizes and industries, but also to content creators like you and me, opening up new opportunities for global expansion. You can create custom voices that captivate your audience and enhance the impact of your videos. Embrace Rask AI directly from this link, now! Share this article: Subscribe to my Newsletters:
The Best Microphone for Content Creators: Hollyland Lark M1 Review
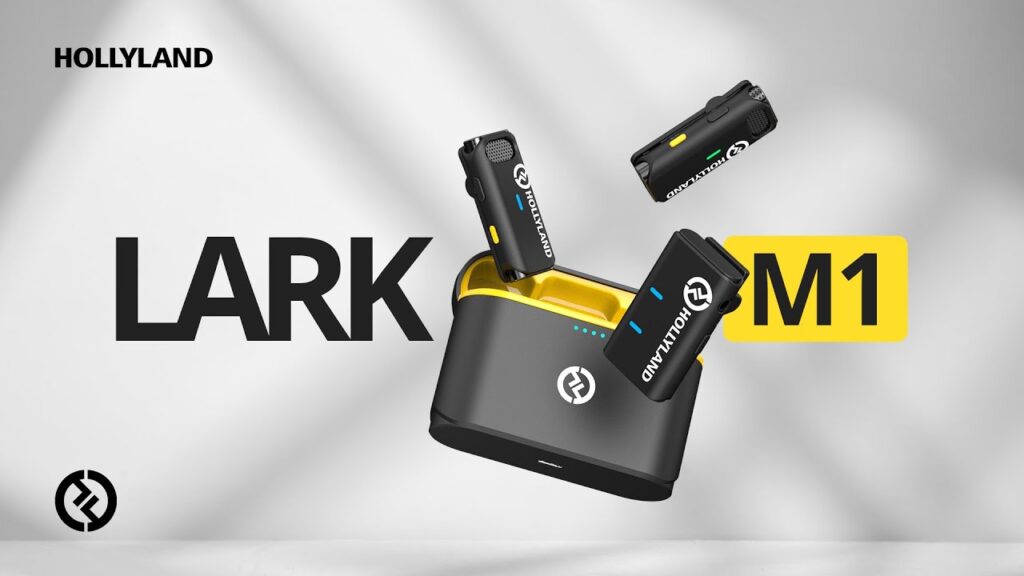
The Best Microphone for Content Creators: Hollyland Lark M1 Review by Hollyland Looking for the perfect Lavalier microphone or a reliable option for vlogging and filmmaking? With numerous choices available, it can be overwhelming to find a wireless microphone that combines excellent sound quality and ease of use. In this article, I will explore the features and performance of the Hollyland Lark M1 Wireless Microphone, a standout option that excels in delivering a clean and clear signal even from a distance. Enter the Hollyland Lark M1, a wireless microphone set that may not have the same sleek and professional appearance as the SmallRig Forevala W60, but it outperforms all the other models mentioned when it comes to broadcasting a clean and clear signal without signal dropouts. Even when you turn your back to the camera, the Lark M1 ensures uninterrupted audio transmission. Let’s take a closer look at the specifications and key features of the Hollyland Lark M1 Duo Digital Wireless Microphone: Specifications: Transmission Range: 650ft (200m) Audio: 48kHz/16bit Wireless Transmission: 2.4GHz Adaptive Frequency Hopping (AFH) Maximum SPL: 110dB SPL Input Dynamic Range: 86dB Latency: 20ms Frequency Range: 20Hz~20KHz Polar Pattern: Omni-directional Dimensions: Transmitter: 48×21.5x10mm (1.9″x0.85″x0.4″) Receiver: 48.3×27.6x11mm (1.9″x1.09″x0.43″) Charging Case: 83x60x30mm (3.3″x2.36″x1.1″) Weight: Transmitter: 11.8g (0.4oz) Receiver: 17.5g (0.62oz) Charging Case: 80g (2.8oz) Battery Life: 8 hours Key Features The Hollyland Lark M1 comes with a compact case that holds two transmitters and one receiver. This case not only protects the microphones and transmitter but also allows simultaneous charging of all three units using a single USB-C cable. However, you also have the option to charge the units independently through their own USB-C ports. This ensures that all three devices are fully charged and ready to perform throughout your shoot. The lightweight and slim design of the microphones (0.4oz, 11.8g) makes them easy to clip onto a subject’s shirt without causing any discomfort. One notable feature is the noise-canceling HearClear function, which effectively reduces background noise, ensuring clear audio recordings. We will delve deeper into the performance of this feature later in the article. The transmitters utilize LC3 Codec technology, enabling the broadcast of high-quality signals with an enhanced sampling rate of up to 48kHz/16bit. Additionally, the omnidirectional microphones on both transmitters ensure optimal voice recording, regardless of the angle at which they are clipped. Build & Handling The Hollyland Lark M1 kit comes neatly packaged in a sturdy and protective grey carry case. Unzipping the case reveals the transmitters, receiver, and additional accessories. The case features a convenient pouch to hold and organize cables, such as a USB-C charging cable and 3.5mm patch cables for connecting the receiver to devices like a DSLR. For iPhone users, a 3.5mm to Lightning port cable is required (sold separately), while an Android-compatible cable is also available. The case includes fluffy windshields for outdoor shooting in windy conditions. It is essential to remove the protective sticky blue tape from the microphone before its first use to ensure optimal sound quality. This simple step can significantly enhance the audio recording experience. The charging case, transmitters, and receiver are constructed with lightweight black plastic, accented with a vibrant yellow color around the base of the lid and inside the case. When the lid is opened, three charging lights pulse to indicate that each device in the kit is fully charged. The front of the case also features four charging indicator lights, allowing for a quick check of the battery levels. During the testing, I used one transmitter and the receiver for three hours, and by the end of the shoot, three out of the four charging indicator lights were still illuminated. This demonstrates excellent battery life, and it’s worth noting that the Hollyland Lark M1 does not feature LCD displays like some other wireless kits, which may contribute to its impressive battery longevity. Performance Upon removing the transmitter and receiver from the charging case, they automatically power up, indicated by the blue lights on each device. The pairing process is seamless and instantaneous, eliminating the need for complicated pairing instructions. Most popular: How to Use Poe.com to Create Engaging AI Chatbots 10 Best AI to Animate your Images Poe: A New Way to Communicate with ChatGPT and others AI Chatbots What is the Metaverse? How to beat the Winter Blues to get motivated again The Power of ChatGPT for Streamlining Business Processes Most Recent: D-Day Line: Your Journey Through History 10 Life Lessons from How I Met Your Mother Fortnite for Newbies: Everything You Need to Know Riscoprire la Spontaneità: Perché Ho Smesso di Tracciare le Mie Abitudini Pika Art AI rivoluziona la creazione di video a partire da immagini Top App per per gestire la tua collezione di carte Pokémon Subsequently, the Lark M1 was used on an actual shoot, specifically to record voiceover while testing the newly released Hobolite Avant LED light. The convenience of quickly taking the transmitter out of the case, clipping it onto the shirt, and plugging the receiver into the iPhone allowed for effortless mobility during the shoot. Reviewing the footage, the sound quality impressed with its clean and clear characteristics. Unlike many other wireless microphones, there was no noticeable latency (delay) between lip movements and the corresponding audio. Although the kit specification states a latency of 20ms, it was negligible when observing the footage. The receiver of the Lark M1 features + and – buttons, offering three input recording levels to choose from. While the highest level appeared slightly too loud, the middle-level setting proved to be the ideal option for recording. To hear the microphone in action and further explore its performance, I recommend checking out the accompanying review video. Intrigued by the mic’s noise-canceling HearClear feature, I ventured outside to a noisier environment. By simply tapping the yellow button on the transmitter, the blue light turned yellow, indicating that the noise-canceling mode was activated. The test video demonstrates the impressive effectiveness of this feature in reducing background ambient noise, such as chattering students. However, it’s
How to create a professional-looking video on a budget

How to create a professional-looking video on a budget Creating a professional-looking video on a budget is possible with careful planning and attention to detail. Here are some tips to help you create a high-quality video without breaking the bank: Plan your video carefully Before you start filming, take some time to plan out what you want to include in your video and how you want to present the information. This will help you stay focused and avoid unnecessary shots and footage. Use a tripod / gimbal A tripod (or gimbal) will help keep your camera steady and ensure that your footage is smooth and professional-looking. This is especially important if you’re filming in a low-light situation or if you’re moving the camera around a lot. Invest in good lighting Poor lighting can make even the best footage look amateurish, so it’s important to invest in good lighting equipment. If you’re on a tight budget, you can use natural light from windows or use inexpensive LED lights to light your subject. Use a microphone The built-in microphone on your camera may not pick up sound very well, especially if you’re filming in a noisy environment. A good-quality microphone will help ensure that your audio is clear and easy to understand. Edit your footage carefully After you’ve filmed your video, take some time to edit the footage to create a polished and professional-looking final product. Use video editing software like Da Vinci Resolve, Final Cut, or Adobe Premiere Pro to trim unnecessary footage, add transitions and effects, and adjust the audio levels. Also, the color grading process has a powerful impact on your final results. By following these tips, you can create a professional-looking video on a budget. With careful planning and attention to detail, you can produce a high-quality video that will impress your audience and help you achieve your goals. Latest Articles: How to create a professional-looking video on a budget Videomaking How to create a professional-looking video on a budget Creating a professional-looking video on a budget is possible with careful planning and attention to detail.Here. How to beat the Winter Blues to get motivated again Growth Mindset How to beat the Winter Blues and get motivated again Winter blues, also known as seasonal affective disorder (SAD), can make it difficult to stay. Top Business Leaders Share Their Insights on ChatGPT AI Technology Top Business Leaders Share Their Insights on ChatGPT AI As a language model trained to write high-quality and SEO-friendly content, I understand the importance of. Why Emoji Are Crucial for Effective Workplace Communication and Beyond Digital Tools Why Emoji Are Crucial for Effective Workplace Communication and Beyond As a Content Creator, I’ve come across countless articles that explain the growing popularity of emoji. Metaverse & Gaming: The Future of Immersive Entertainment Gaming Metaverse & Gaming: The Future of immersive Entertainment The Metaverse is a term used to describe a virtual world where users can interact with each. The Fascinating History of Emoji: From Japan to Global Phenomenon Creativity The Fascinating History of Emoji: From Japan to Global Phenomenon Emojis have become a ubiquitous part of modern communication, but their origins and development are. The Future of Work: How Technology is Transforming the Way We Do Business Digital Tools The Future of Work: How Technology is Transforming the Way We Do Business The future of work is an exciting, yet uncertain, prospect. The rapid. My personal journey through Death Stranding Gaming My personal journey through Death Stranding As a huge fan of Hideo Kojima, I had been eagerly awaiting the release of Death Stranding ever since. The Power of ChatGPT for Streamlining Business Processes Digital Tools The Power of ChatGPT for Streamlining Business Processes Artificial intelligence (AI) is changing the way we live and work. One of the most notable applications. What is the Metaverse? Creativity What is the Metaverse? The metaverse is a term used to describe the concept of a virtual world where users can interact with each other.
How to create an engaging video script

How to create an engaging video script Creating an engaging video script is essential for capturing the attention of your audience and keeping them interested in your message. Here are some tips to help you create a compelling video script: Start with a compelling story or concept The key to a great video is a compelling story or concept that will grab the attention of your audience and keep them engaged. Start by brainstorming ideas and then narrow down to the one that you think will be the most engaging. Keep it simple A video script should be easy to understand and follow, so avoid using complex language or convoluted structures. Instead, use simple language and a clear, linear structure to keep your audience engaged and focused on your message. Use visuals to support your message A video is a visual medium, so use visuals to support your message and help your audience understand your points. This can include images, graphics, and other visual elements that help illustrate your points and keep your audience engaged. Use storytelling techniques Storytelling is a powerful tool for engaging your audience, so use techniques like character development, conflict, and resolution to create a compelling narrative for your video. This will help your audience connect with your message and stay engaged throughout the video. Keep it concise A video script should be concise and to the point, so avoid going on long tangents or providing unnecessary details. Keep your script focused and concise, and trim any unnecessary information to keep your audience engaged and interested. By following these tips, you can create an engaging video script that will captivate your audience and keep them interested in your message. With a compelling story or concept, clear language, and effective storytelling techniques, you can create a video that will effectively convey your message and achieve your goals. Latest Articles: How to create an engaging video script The Power of Mindset: How to Transform Your Life by Changing Your Thoughts How to Develop Communication Skills The Role of a Content Creator Discovering the World Through the Lens: A Photography Traveler's Journey How to start in Videomaking The essentials of lighting for Videomaking The secrets of street photography: Capturing wonderful moments on the go The art of storytelling in videomaking How to create a video marketing Strategy
How to start in Videomaking
How to start in Videomaking Are you looking to start a career in videomaking or just want to learn how to make videos for fun? Either way, the process of creating a video can be both exciting and daunting, especially if you’re just getting started. In this article, I’ll provide some tips and advice based on my experience about how to start making videos and turn your creative ideas into professional-looking productions. First and foremost, it’s important to have a clear idea of what you want your video to be about. Whether it’s a tutorial, a vlog, a music video, or something else entirely, having a specific topic or concept in mind will help guide your planning and production process. Once you have a general idea of what your video will be about, it’s time to start planning. This is where you’ll want to think about the details of your video, such as the length, the shots you’ll need, and the overall look and feel of the final product. You’ll also want to consider the equipment and resources you’ll need to make your videos, such as a camera, a tripod, and any other special effects or tools you might need. Once you have your plan in place, it’s time to start shooting. Depending on the type of video you’re making, this could involve setting up a camera on a tripod and recording yourself, or it could involve a more elaborate setup and planning. Either way, the key is to be prepared and to have a clear idea of what you want to capture on camera. After you’ve finished shooting your video, it’s time to start editing. This is where you’ll take all of the raw footage you’ve captured and turn it into a cohesive, polished final product. This can be a time-consuming process, but with the right tools and a little bit of practice, you’ll be able to create professional-looking videos in no time. In conclusion, making videos can be a fun and rewarding hobby or career. By starting with a clear idea, planning carefully, and being prepared to shoot and edit your footage, you’ll be able to create videos that are both engaging and professional-looking. With a little bit of practice, you’ll be well on your way to becoming a videomaking pro. Latest Articles: How to create an engaging video script The Power of Mindset: How to Transform Your Life by Changing Your Thoughts How to Develop Communication Skills The Role of a Content Creator Discovering the World Through the Lens: A Photography Traveler's Journey How to start in Videomaking The essentials of lighting for Videomaking The secrets of street photography: Capturing wonderful moments on the go The art of storytelling in videomaking How to create a video marketing Strategy
The essentials of lighting for Videomaking

The essentials of lighting for videomaking Lighting is a crucial element of videomaking, as it helps to set the mood and tone of a scene, and can also highlight the important features of a subject. Here are the essentials of lighting for videomaking: Key light The key light is the main light source in a scene and is typically placed on one side of the subject. It is used to illuminate the subject and create shadows, which can help to define the shape and contours of the subject. Fill light The fill light is a secondary light source that is used to fill in shadows created by the key light. It is typically placed on the opposite side of the key light, and is used to soften the shadows and create a more even lighting on the subject. Back light The backlight is a light source placed behind the subject and is used to separate the subject from the background. It creates a rim of light around the subject, which can help to highlight the subject and create a three-dimensional look. Ambient light Ambient light is the natural light present in a scene and can come from windows, overhead lighting, or even the sun. It is important to consider the ambient light when setting up your lighting, as it can affect the overall look of the scene. Color temperature The color temperature of a light source refers to the hue of the light and is measured in degrees Kelvin. Warm light has a lower color temperature (e.g. candlelight, incandescent bulbs), while cool light has a higher color temperature (e.g. daylight, fluorescent bulbs). Mixing light sources with different color temperatures can create an unbalanced look, so it’s important to match the color temperature of your lights to create a cohesive look. Light intensity The intensity of a light source refers to how bright or dim it is, and can be adjusted using dimmer switches or by moving the light closer or farther away from the subject. It’s important to pay attention to the intensity of your lights, as too much light can wash out the subject, while too little light can make the subject appear too dark. Lighting ratios The lighting ratio is the ratio of the intensity of the key light to the fill light. A high lighting ratio (e.g. 4:1) will create more contrast and drama, while a low lighting ratio (e.g. 1:1) will create a more even, flat look. Experimenting with different lighting ratios can help you achieve the desired mood and tone in your scene. By understanding and using these essential lighting techniques, you can create professional-looking videos that effectively communicate your message. In conclusion, lighting is a crucial element of videomaking that can greatly impact the mood and tone of a scene. By understanding and utilizing the key light, fill light, backlight, ambient light, color temperature, light intensity, and lighting ratios, you can effectively create professional-looking videos that effectively communicate your message. If you’re looking to improve your lighting skills, there are many resources available, including online tutorials and workshops. Don’t be afraid to experiment with different lighting setups and techniques to see what works best for your specific project. And remember, the most important thing is to have fun and be creative! Happy filming! Latest Articles: How to create an engaging video script The Power of Mindset: How to Transform Your Life by Changing Your Thoughts How to Develop Communication Skills The Role of a Content Creator Discovering the World Through the Lens: A Photography Traveler's Journey How to start in Videomaking The essentials of lighting for Videomaking The secrets of street photography: Capturing wonderful moments on the go The art of storytelling in videomaking How to create a video marketing Strategy
The art of storytelling in videomaking

The Art of Storytelling in Videomaking Storytelling is an essential part of videomaking, as it helps to capture the attention of your audience and keep them engaged with your message. A well-crafted story can help you convey complex ideas in a way that is easy to understand and remember, and can make your video more impactful and memorable. Here are some tips for using storytelling techniques in your videos: Start with a compelling story or concept The key to a great video is a compelling story or concept that will grab the attention of your audience and keep them engaged. Start by brainstorming ideas and then narrow down to the one that you think will be the most engaging. This could be a personal story, an interesting fact, or a relatable situation that your audience can relate to. Use character development A well-developed character can help your audience connect with your message and make your story more relatable. Use character development techniques, such as dialogue and actions, to create engaging and relatable characters that your audience can identify with. This could be a main character who is facing a challenge or obstacle, or a group of characters who are working together to overcome a problem. Use conflict and resolution Conflict is a key element of storytelling, as it creates tension and keeps your audience engaged. Use conflict to create obstacles for your characters to overcome, and then resolve the conflict in a satisfying way to keep your audience engaged and invested in your story. This could be a problem that the main character must solve or a challenge that the group must overcome together. Use visual elements to support your story A video is a visual medium, so use visuals to support your story and help your audience understand your points. This can include images, graphics, and other visual elements that help illustrate your points and keep your audience engaged. For example, you could use images or footage to show the setting of your story, or use graphics to explain complex ideas in a simple and visual way. Keep it concise A video should be concise and to the point, so avoid going on long tangents or providing unnecessary details. Keep your script focused and concise, and trim any unnecessary information to keep your audience engaged and interested. This means avoiding long-winded explanations or tangents that don’t add to your story and sticking to the main points that you want to convey. By using these storytelling techniques, you can create a video that is engaging, relatable, and impactful. With a compelling story, well-developed characters, and effective conflict and resolution, you can create a video that will captivate your audience and effectively convey your message. Learn more about Videomaking! Latest Articles: How to create a video marketing Strategy Why you should read “Rich Dad, Poor Dad” Pictory.ai: The Evolving Video Maker for Creatives 10 Steps to Achieving Your Goals and Living Your Best Life Five hobbies to improve your photography skills
How to create a video marketing Strategy

How to create a video marketing Strategy Video marketing is a powerful tool for businesses of all sizes. It can help increase brand awareness, drive traffic to your website, and even boost sales. But to get the most out of your video marketing efforts, you need to have a solid strategy in place. Here are some steps to help you create a successful video marketing strategy: Define your goals The first step in creating a video marketing strategy is to determine what you want to achieve with your videos. Do you want to increase brand awareness, drive traffic to your website, or boost sales? Knowing your goals will help you create videos that are targeted and effective. Identify your target audience Who are you creating your videos for? Understanding your target audience will help you create content that resonates with them and meets their needs. You can use tools like Google Analytics or social media insights to gather data on your audience, such as their age, location, and interests. Determine your budget How much money do you have to invest in your video marketing efforts? Your budget will determine the type of videos you can create and the platforms you can use to share them. Keep in mind that you don’t need a huge budget to create effective videos. You can use simple, low-cost tools like your smartphone to create high-quality content. Choose the right platforms There are many different platforms you can use to share your videos, including YouTube, Facebook, Instagram, and LinkedIn. Consider the type of content you’re creating and which platform your target audience is most likely to use when deciding where to share your videos. Create a content calendar A content calendar is a schedule of the videos you plan to create and share. It can help you stay organized and ensure that you’re consistently creating and sharing new content. Consider the goals you’ve set for your video marketing efforts and the interests of your target audience when creating your content calendar. There are a lot of Digital Tools like Notion that can help you to create or organize your tasks and strategies. Develop a style guide A style guide is a set of guidelines that outlines the tone, look, and feel of your videos. It can help ensure that your videos are consistent and on brand. Your style guide should include elements such as the colors and fonts you’ll use, the types of graphics you’ll include, and the tone of your narration. Plan your video production Once you’ve created a content calendar and style guide, it’s time to start planning the production of your videos. This includes deciding on a location, scouting out locations, and booking talent. You’ll also need to decide on the equipment you’ll use, such as cameras and lighting, and plan any necessary rehearsals or script readings. Promote your videos Just creating videos isn’t enough – you need to make sure people see them. There are many ways to promote your videos, including sharing them on social media, emailing them to your subscribers, and embedding them on your website. You can also use paid advertising on platforms like YouTube and Facebook to reach a wider audience. Here are a few examples of successful video marketing campaigns: Dollar Shave Club: Dollar Shave Club’s viral video, which features the company’s founder, Michael Dubin, discussing the benefits of their subscription service, has been viewed over 25 million times on YouTube. The video helped the company grow from a startup to a major player in the grooming industry. GoPro: GoPro’s action camera videos showcase the exciting and adventurous activities that their customers capture with their products. These videos have helped GoPro establish itself as a leader in the action camera market and have gained millions of views on YouTube. Old Spice: Old Spice’s “The Man Your Man Could Smell Like” campaign was a series of humorous and memorable TV commercials that featured a charismatic spokesman, Isaiah Mustafa. The campaign was so successful that it helped boost Old Spice’s sales by 107%. Airbnb: Airbnb’s “Don’t Go There, Live There” campaign featured a series of short films that showed travelers experiencing unique and immersive trips around the world. The campaign helped Airbnb’s brand stand out and increased bookings by 31%. In conclusion, creating a successful video marketing strategy involves defining your goals, identifying your target audience, determining your budget, choosing the right platforms, creating a content calendar, developing a style guide, planning your video production, and promoting your videos. By following these steps, you can create videos that effectively reach and engage your audience and help you achieve your business goals. Latest Articles: Why you should read “Rich Dad, Poor Dad” Pictory.ai: The Evolving Video Maker for Creatives 10 Steps to Achieving Your Goals and Living Your Best Life Five hobbies to improve your photography skills From amateur to pro: A step-by-step guide to improving your photography skills