Guide to Snow (Winter) Photography
Capturing the beauty of snow-covered landscapes can be a rewarding yet challenging endeavor. The bright, reflective nature of snow can create exposure issues, while the cold weather can affect both the photographer and their equipment.
I will share essential tips for photographing snow, step-by-step instructions, and editing techniques to help you create stunning winter images. Additionally, I’ll highlight some of the most famous photographs that showcase the beauty of snow.
Understanding Snow Photography
Why Photograph Snow?
Snow transforms ordinary landscapes into magical winter wonderlands. The way it blankets trees, hills, and buildings creates unique textures and patterns that are visually captivating. Moreover, snow acts as a natural reflector, bouncing light around and illuminating scenes in a soft glow. However, the challenges of shooting in snowy conditions require careful planning and technique.
Famous Winter Photographs
Throughout history, many photographers have captured iconic winter scenes that evoke emotion and tell stories. One notable example is “Lone Bison” by Tony Spencer, which beautifully portrays a solitary bison against a vast snowy landscape in Yellowstone National Park. This image captures the bleak yet stunning beauty of winter, emphasizing the isolation of the animal in its environment.

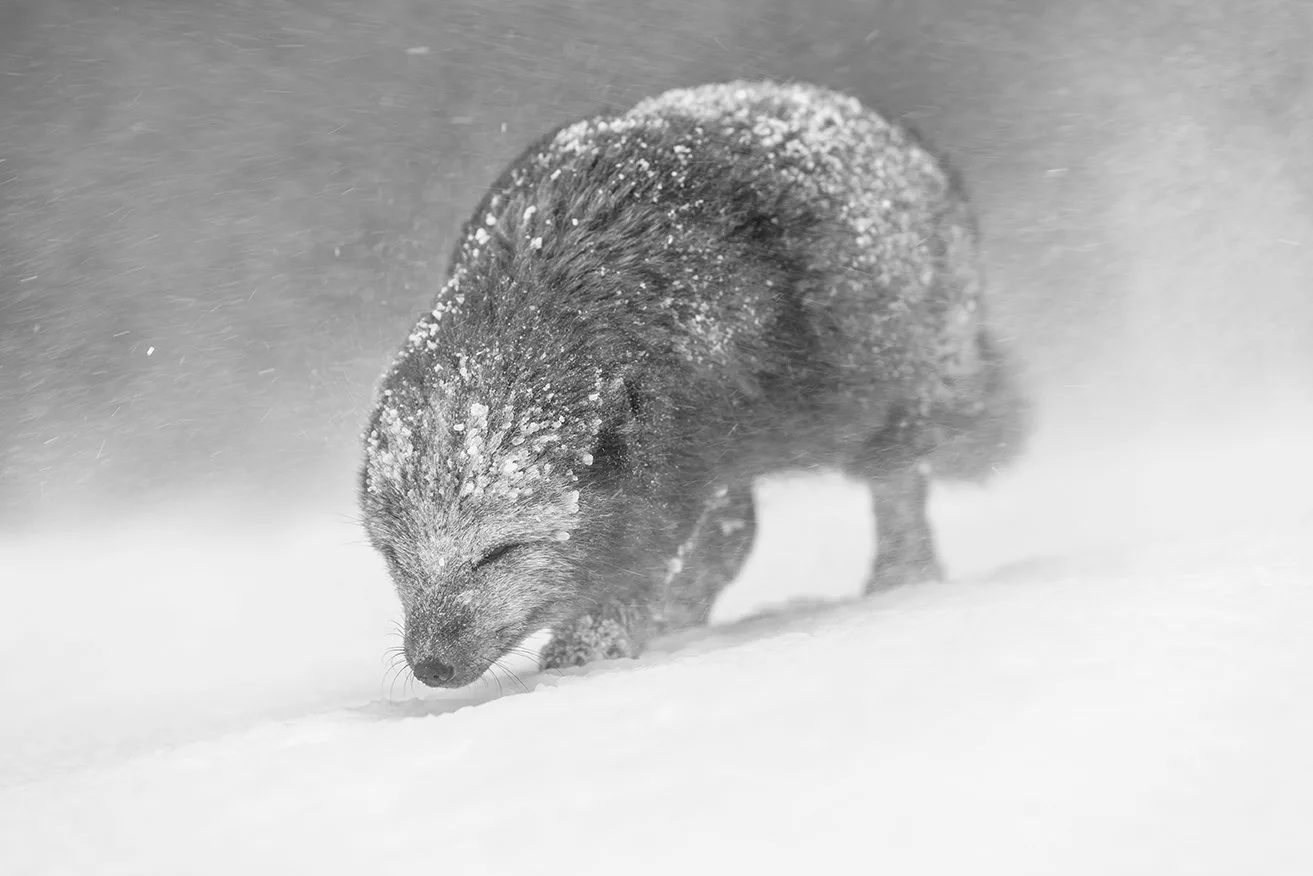
Another remarkable photograph is “Arctic Fox” by Vince Burton, which features a rare blue morph Arctic fox navigating through a snowstorm in Iceland. This image won a Gold award in the World Nature Photography Awards and exemplifies the challenges of photographing wildlife in harsh winter conditions.
Preparing for Your Snow Photography Shoot
Gear Essentials
Before heading out into the cold, ensure you have the right gear:
- Camera: A DSLR or mirrorless camera with good high-ISO performance.
- Lenses: A versatile zoom lens (e.g., 24–70mm) or a prime lens for portraits (e.g., 50mm).
- Tripod: To stabilize your shots, especially in low light.
- Filters: A polarizing filter can enhance contrast and reduce glare from the snow.
- Weather Protection: Use a rain cover or plastic bag to protect your camera from moisture.
Clothing and Safety
Dress warmly in layers to stay comfortable during your shoot. Waterproof boots and gloves are essential for protecting yourself from cold and wet conditions. Always be mindful of your surroundings to avoid slipping on ice or getting lost in remote areas.
Step-by-Step Guide to Photographing Snow
Step 1: Choose the Right Time
The best times to photograph snow are during early morning or late afternoon when the light is soft and golden. Overcast days can also provide even lighting without harsh shadows.
Step 2: Set Your Camera Settings
Here’s a list of recommended settings for shooting in snow:
- Mode: Manual or Aperture Priority mode.
- ISO: Start at 100–400; increase if necessary due to low light.
- Aperture: Use f/8 to f/11 for landscapes; f/2.8 to f/4 for portraits with bokeh.
- Shutter Speed: At least 1/100s for still subjects; faster (1/500s) for moving subjects.
- White Balance: Set to Auto or adjust based on lighting conditions.
Step 3: Composition Techniques
- Find Contrast: Look for colorful elements against the white snow — like red berries or dark tree trunks — to create visual interest.
- Use Leading Lines: Incorporate paths or streams that draw the viewer’s eye into the scene.
- Frame Your Subject: Use natural frames like branches or archways to highlight your focal point.
Step 4: Capture Movement
To photograph falling snow effectively:
- Use a fast shutter speed (1/500s) for sharp flakes.
- For a dreamy effect, try slower shutter speeds (1/100s) to create motion blur.
Step 5: Review Your Shots
After taking photos, review them on your camera’s display to check exposure and composition. Adjust settings as needed based on what you see.
Editing Your Snow Photos
Editing is crucial for enhancing your snowy images and correcting any exposure issues caused by bright conditions.
Basic Adjustments
- Import Your Photos: Use software like Adobe Lightroom or Photoshop.
- Correct Exposure: Adjust highlights down if they’re too bright; increase shadows to bring out details.
- White Balance: Fine-tune white balance if your snow appears too warm or cool.
Most popular:
Most Recent:
Newsletter:
Advanced Techniques
- Enhance Contrast: Increase contrast slightly to make whites pop against darker elements.
- Sharpen Details: Apply sharpening selectively to areas where you want more clarity (like textures in snow).
- Color Grading: Add subtle tones during editing — warm hues can enhance sunset shots while cooler tones suit overcast scenes.
Final Touches
Before finalizing your edits:
- Zoom in to check details.
- Consider cropping for better composition.
- Save your work in multiple formats (JPEG for sharing, TIFF for printing).
Conclusion
Photographing and editing snow can be an incredibly rewarding experience when approached with preparation and creativity.
By understanding your camera settings, utilizing effective composition techniques, and mastering post-processing skills, you can create breathtaking winter images that capture the essence of this beautiful season.
Check my Partners for discounts: PhotoGrid, Leica, Polaroid, MSI, Lenovo, TikTok, CupCat, DJI.


